Update: It appears LightLeaks.me is no longer in business. You can take these ideas, however and still apply them to your films.
Whether you’re creating home movies, wedding films, short films or even travel diaries, using light leaks are a great way you to give your films character and really make them stand out.
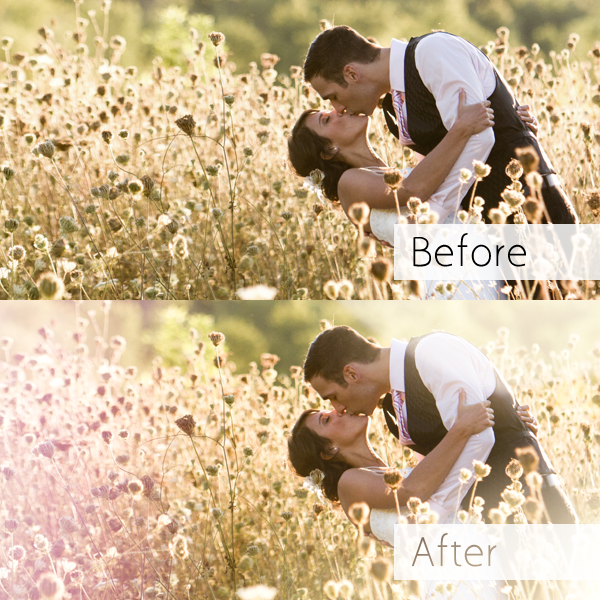
Light leaks, also known as film burns, haven’t always been a friend to filmmakers. Back in the day, light leaks were considered a pain. In old cameras, film was protected in a sealed chamber, one that light couldn’t penetrate. However, every now and again, general wear-and-tear would cause a tiny gap or hole to form in the camera body, leaking light into the chamber, exposing the film. This excess light, would create interesting flares and shapes on the image.

More recently, light leaks have become a way of giving your films a vintage look. And with the popularity of instant filters, this effect is more popular than ever.
So, how do you get these light leaks? A technique called ‘lens-wacking” is popular amongst DSLR filmmakers. It involves detaching the lens and holding it ever-so-slightly away from the camera body, allowing light to sneak onto the sensor. You can pick up and camera and try it for yourself, the results are instantaneous. With so many variables contributing to the how it looks, it’ll be very difficult to recreate that exact look again. Some people really like the spontaneity.
Some filmmakers elect to do this whole process in post production as it gives them flexibility to control the effect exactly how they want. The really great thing about this is that it doesn’t require much time at all. In fact, it’s probably faster to create this effect in post.
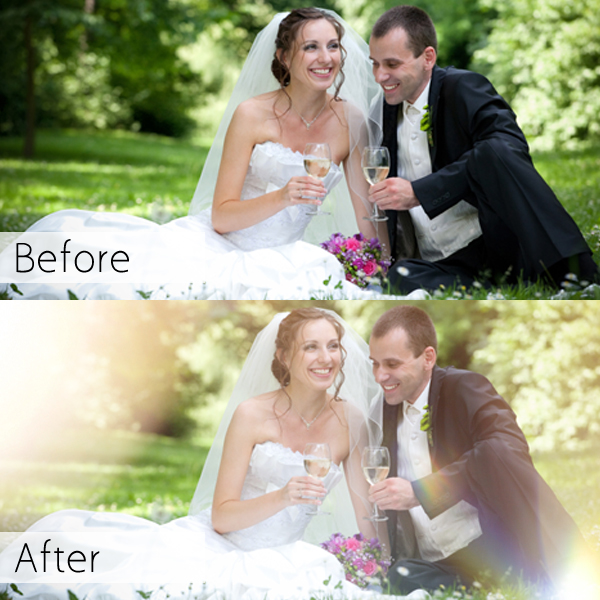
To do this, take any of the major non-linear editing programs that are on the market; Final Cut Pro, Avid Media Composer, Adobe Premiere, Sony Vegas, Etc. Whether you create light leaks yourself or get them from somewhere else, your light leak will be a digital movie file that is shot on a black background. The background being completely black is the key here. Once you’ve got your light leak file, here’s what you do next:
- Step 1. Import all your media into your editing program. This includes the light leaks you want to use.
- Step 2. Place your selected light leak onto your timeline directly above the footage you want to enhance. You can always move it around later but it’s best to get it as close as possible.
- Step 3. Change the blending mode. I prefer using “screen.”
- In Final Cut Pro X you can find the blending mode in the inspector window, scroll down to the bottom and you’ll find “compositing”, select “screen” from the drop down menu. In Premiere Pro you can find the blending mode under the “effects controls” tab in your source window. For those using Final Cut Pro 6 or 7 (I know it’s hard to let go), you can change the blending mode by simply right clicking on your light leak and scrolling down to the blending mode option.
- Step 4. That’s all it takes! Play back the footage on your timeline. Looks great right?
Those basic steps are just the tip of the iceberg. Having digital light leaks are great because you can manipulate them any way you like. Change the speed, color, opacity and even the scale. The world is your oyster!
Check out the video below to see it action:
If you’re looking for a great set of light leaks, check out http://www.lightleaks.me. There are over a 120 full HD light leaks that will definitely set your projects apart from the competition.