Update: Apple released Aperture 3 at the beginning of 2010 which now allows for Aperture Vaults to be placed on NAS drives. These instructions are only needed for Aperture 2 or below.
Aperture is an amazing application built by Apple that allows you to enhance images, manage massive photo libraries and essentially helps you to create stunning photos.
Aperture has a backup features called Vault that works by allowing you to create a virtual vault, essentially a backup of your entire organized library onto another hard drive. Once you make changes to your main library, you can tell Aperture to sync and those changes are copied over to your main backup.
The problem lies in that Aperture only allows you to create a vault on an external drive. Many of us, including myself use NAS drives – Network Attached Storage. I’m actually surprised Apple doesn’t support this as it’ll work perfectly with their other pro storage solutions.
However, I have found about a workaround that does in fact allow you to create a vault on a NAS drive. The remedy revolves around using a type of disc image stored on your NAS drive called a sparse bundle that acts as an external hard drive when mounted to your desktop. This does allow you to store your Vault on the NAS drive but it does have it’s limitations. So here comes the warning:
WARNING: you do in some way have a greater risk of losing everything if the disc image becomes corrupted. Unlike a hard drive you might be able to recover most of not all of the backup but with the disk images it can be much harder. However, the sparse bundle image is the same as a Time Machine backup so if you’re happy with that, you should be happy with this. (Time machine backups have been known to get corrupted! – So you are warned)
So is this is a great solution or not, well that’s up to you to decide. For now this is how I did it.
- Open Disk Utility from your Utilities folder.
- Go to the menu File > New Disk Image
- Fill out the information in the form:
You can allocate as much space as you desire ( of course assuming you have that much space on your NAS drive)
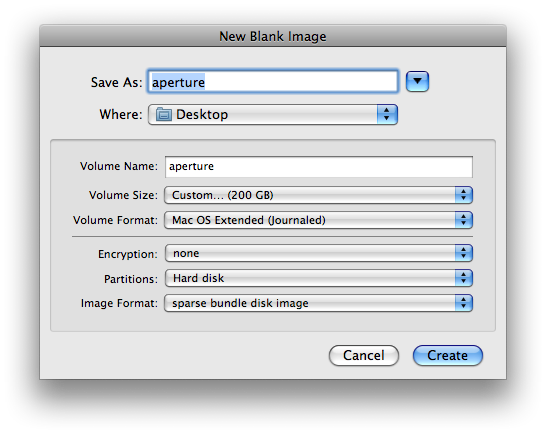
- Then save it to your Desktop. It’ll automatically mount to your desktop too, which you can then just right-click on it and eject.
- Copy the newly created image to your NAS drive.
Now you just need the disk image to mount to your desktop. You can do this by double clicking on the image and it’ll mount, or if you wish for it to always mount when you login you can use your Account Login items.
Open System Preferences:
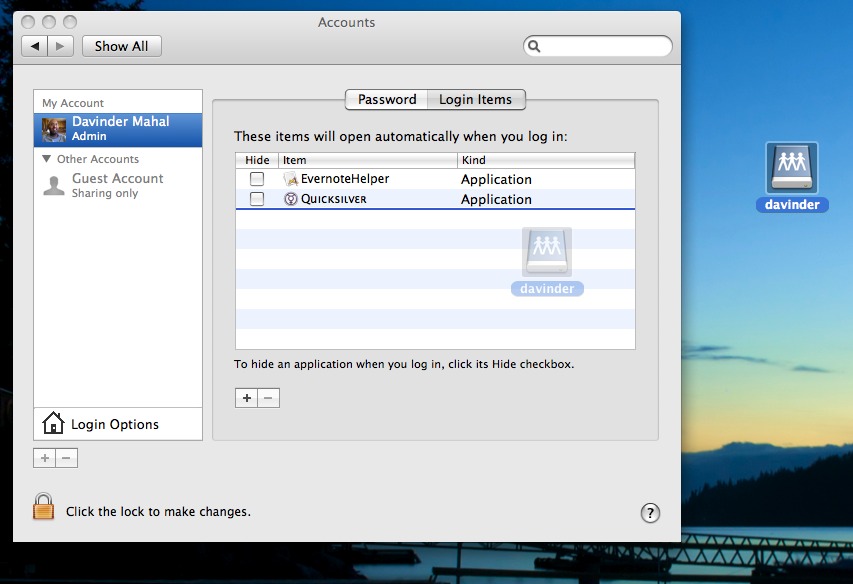
- Click on Accounts
- Click on the tab “Login Items”
- Drag the icon to your nas drive icon from your desktop into the window.
- Do the same for the sparse bundle disk image from your NAS drive.
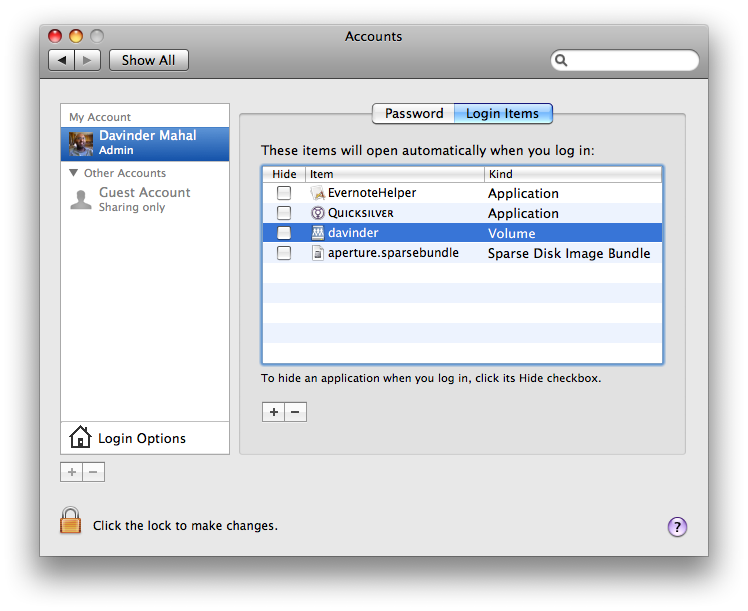
Now, if you were to log out and then log back in again, your NAS drive should automatically mount and then in turn the disk image will also mount to your desktop.
You should now be able to use Aperture’s Vault management system and create a new vault on this newly mounted disk image.
From Aperture, go to the File menu, File > Vault > Add Vault
Name your vault and then chose where you want your vault, and thus selecting the new mounted disk image on your desktop.
And boom, you are set. Now just back up your vault and you’ve now got your Aperture Vault on your NAS drive.
For more information on Aperture’s backup and vault systems check Aperture’s manual on page 611 where it describes it in detail.